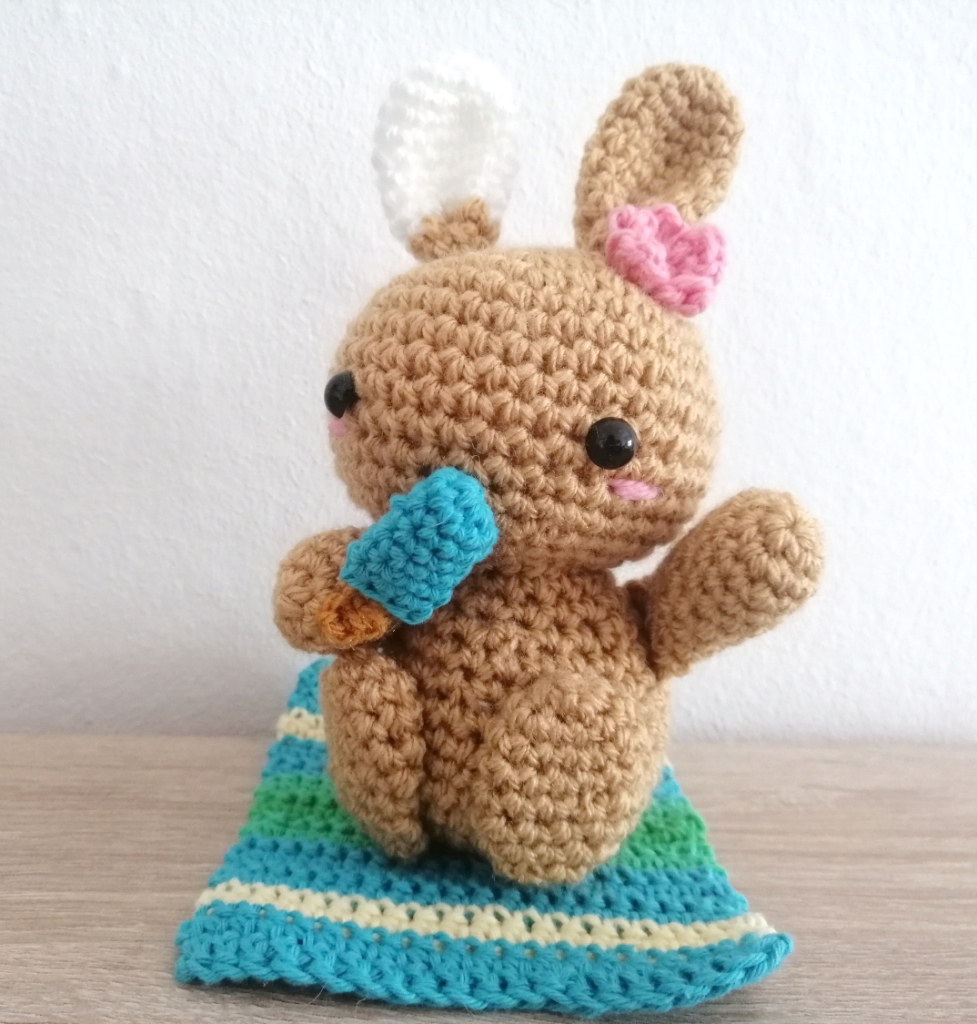
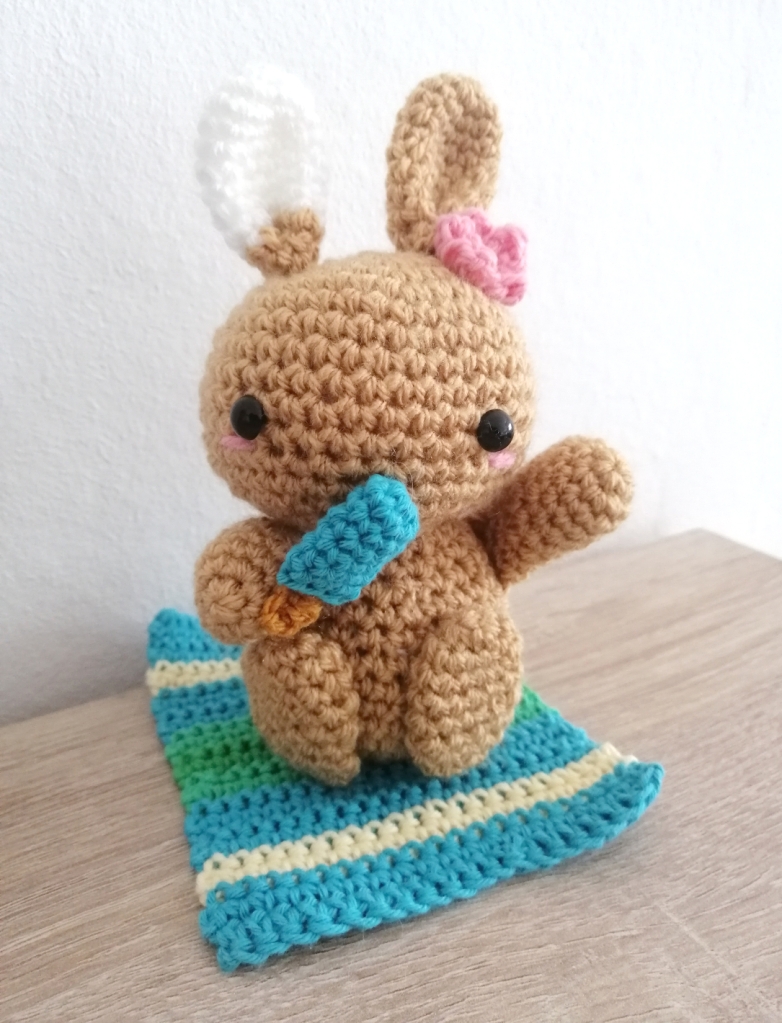
Hello world! Somehow I managed to complete the August bunny just about in time to publish this today. I have not been feeling very well recently which has made finishing this little guy quite a challenge – even though he is definitely very easy to make! I was originally gonna make a different pose and add a parasol, but I just didn’t have the energy and time to actually do so. Maybe I will rework this pattern someday, but for now, enjoy the beach bunny! ❤
Pattern
Materials
To make the beach bunny you will need:
– A 2.5mm Crochet hook
– Yarn in whatever colors you’d like for the bunny, the popsicle, and the towel (I used tan and white for the bunny, blue and brown for the popsicle, scraps of blue, yellow and green for the towel and some pink for the cheeks and flower)
– A tapestry needle and scissors
– Stuffing
– A stitch marker to help you keep track of the start of the round
– Safety eyes
Please note that you can make the beach bunny using any size crochet hook and yarn weight for a smaller or bigger result. I like using DK as it’s most commonly available. If you make amigurumi, it is usually recommended to go down a bit from the recommended hook size for the yarn to allow for a no-hole look (we don’t want to see the stuffing show through in between stitches)! Using DK yarn and a 2.5mm crochet hook, the beach bunny should be about 15cm tall.
Stitches & Abbreviations
The pattern is written using US crochet terms in continuous spirals. You will need to know the following kinds of stitches to make him:
– Magic Ring (MR)
– Chaning (Ch)
– Single crochet (sc)
– Decrease (dec); preferably using the invisible decrease method
– Increase (inc)
– Half double crochet (hdc)
– Double crochet (dc)
– Slip stitch (sl)
And now, let’s get started!
Head
Round 1: In a MR, sc 6
Round 2: Inc around (12)
Round 3: (Sc, inc) around (18)
Round 4: (Sc 2, inc) around (24)
Round 5: (Sc 3, inc) around (30)
Round 6: (Sc 4, inc) around (36)
Round 7-14 (8 rounds): Sc around (36)
Round 15: (Sc 4, dec) around (30)
Round 16: (Sc 3, dec) around (24)
Round 17: (Sc 2, dec) around (18), insert safety eyes between rounds 11 and 12, approx. 7 stitches apart and stuff
Round 18: (Sc, dec) around (12)
Round 19: Dec around (6), fasten off and sew closed
Body
Round 1: In a MR, sc 6
Round 2: Inc around (12)
Round 3: (Sc, inc) around (18)
Round 4: (Sc 2, inc) around (24)
Round 5: (Sc 3, inc) around (30)
Round 6: (Sc 4, inc) around (36)
Round 7-9 (3 rounds): Sc around (36)
Round 10: (Sc 4, dec) around (30)
Round 11-12: Sc around (30)
Round 14: (Sc 3, dec) around (24)
Round 15-16: Sc around (24)
Round 17: (Sc 2, dec) around (18)
Round 18-19: Sc around (18), fasten off and stuff
Arms (make 2)
Round 1: In a MR, sc 6
Round 2: Inc around (12)
Round 3-6 (4 rounds): Sc around (12)
Round 7: (Sc 2, dec) around (9)
Round 8-10 (3 rounds): Sc around (9), fasten off
Feet (make 2)
Round 1: In a MR, sc 6
Round 2: Inc around (12)
Round 3-5 (3 rounds): Sc around (12)
Round 6: (Sc 2, dec) around (9)
Round 7-8: Sc around (9)
Round 9: (Sc, dec) around (6), fasten off and sew closed
Ears (make 2)
Round 1: In a MR, sc 6
Round 2: Inc around (12)
Round 3-11 (9 rounds): Sc around (12)
Tail
Round 1: In a MR, sc 6
Round 2: (Sc, inc) around (9)
Round 3: Sc around (9)
Round 4: (Sc, dec) around (6), stuff lightly and fasten off
Popsicle
Round 1: In a MR, sc 8
Round 2-6 (5 rounds): Sc around (8), then sew or crochet closed. Insert your hook into the center of the closed bottom, then using the yarn for the stick, ch 4 and sc 3. Fasten off.
Towel
Row 1: Ch 21, sc 20
Row 2-26: Sc across (20), then fasten off. Note that you can make the towel as wide and long as you’d like and implement color changes as you wish. I worked 4 rows of blue, then 2 rows of yellow, 4 blue, 6 green, 4 blue, 2 yellow, 4 blue.
Flower
Round 1: In a MR, sc 5
Round 2: In the same stitch, (hdc, dc, hdc, sl). Then slip stitch into the next stitch. Repeat this five times around and fasten off
Assembly
Assembly is simple. Take the ears and fold them in half at the bottom, then sew them to the head. Then sew the head to the body. Sew on the feet, tail, and arms. Sew the popsicle to both the hand and the face of the bunny to make it look like he’s eating. Sew on the flower and embroider some cheeks (optional). Then all you need to so is sit him down onto the towel and place him somewhere sunny!
And that’s it! Enjoy your new little friend! You may post pictures of your beach bunny online as well as sell amigurumi made from this pattern, but I ask that you credit me as the creator of this pattern. Please do not redistribute the pattern.
If you like what I’m doing, consider following me over on Twitter and/or supporting me on Ko-Fi ❤


1 thought on “Meet the beach bunny! (August bun; pattern)”