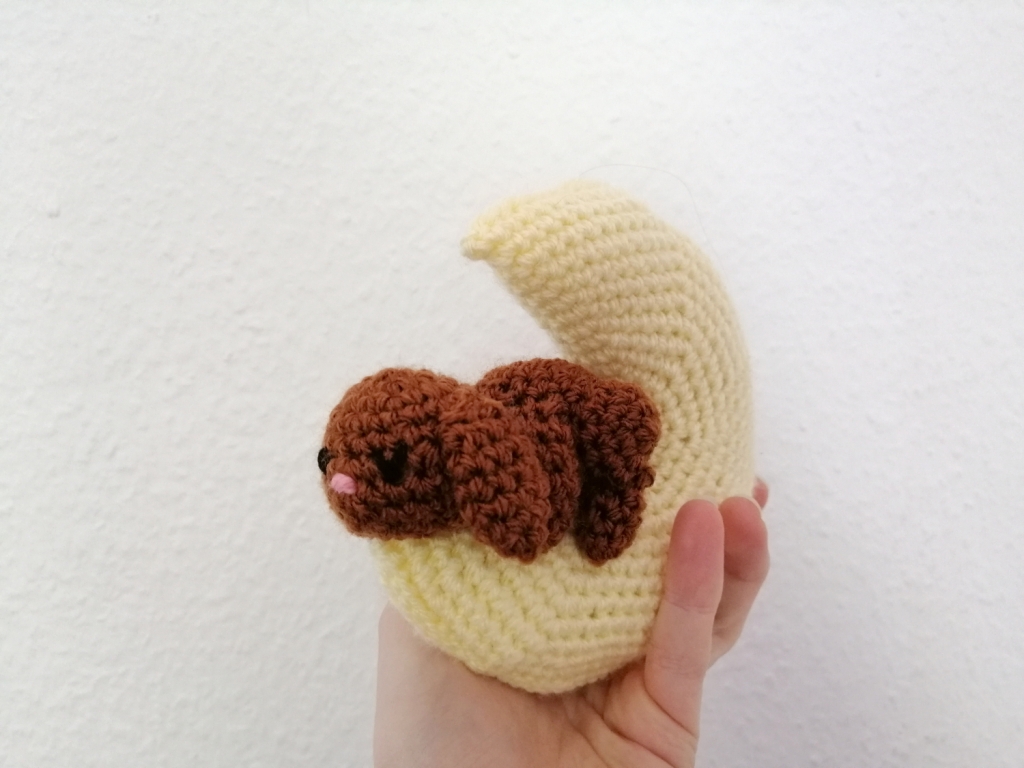
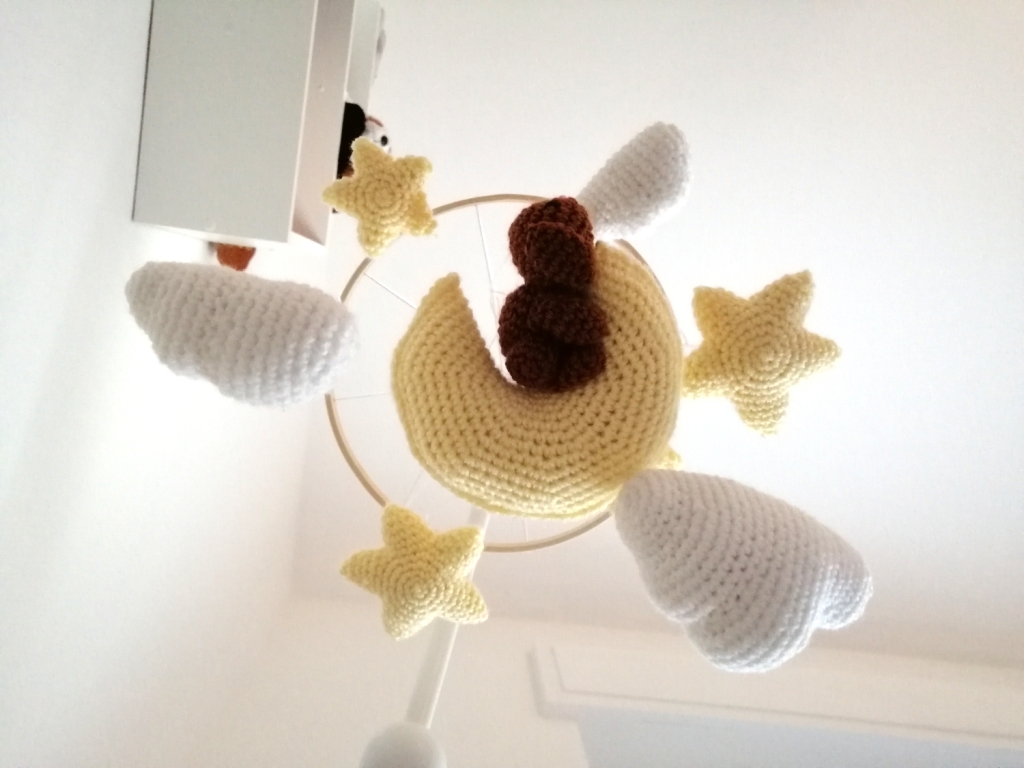
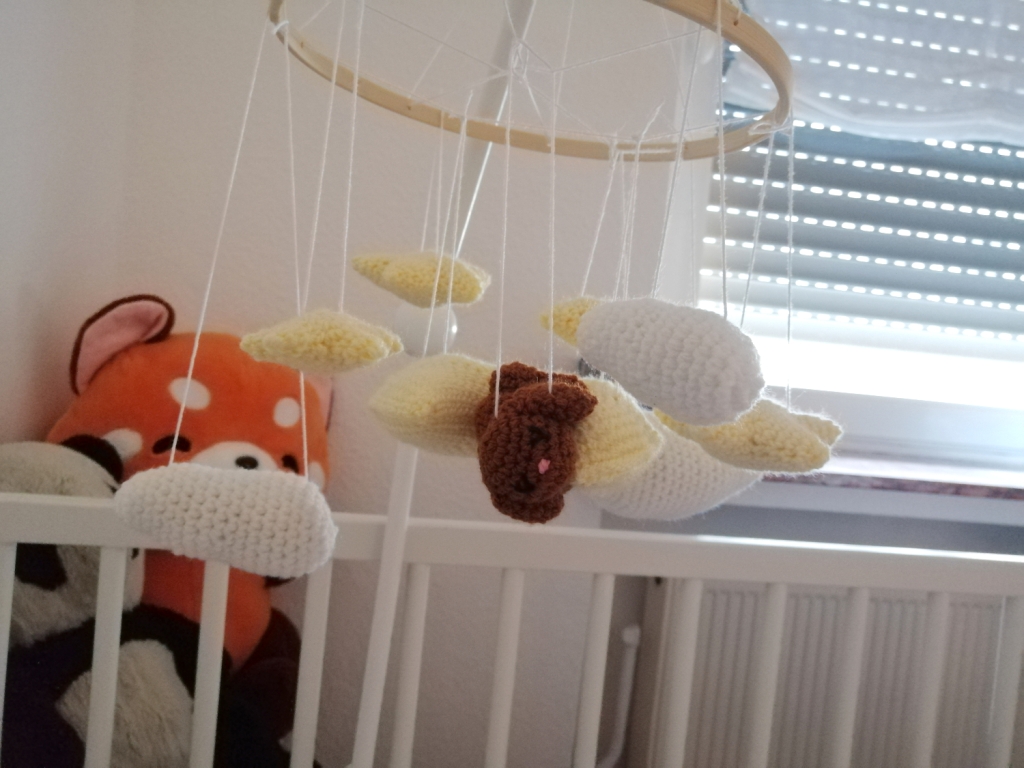
Long time no see (again)! Life with a baby has me completely occupied; either baby girl is awake and I interact with her (obviously), or she is asleep attached to me, leaving me with little room to do anything. Therefore it has taken me an absolute eternity to make this bunny on the moon for my daughter’s mobile – but finally I got around to finishing it! Whether you just make the bunny on the moon, or an entire mobile for your little one, the choice is yours! If you want to make the mobile, I’ve used Raffamusa‘s patterns for the clouds and stars and simply slightly alternated them in size.
Pattern
Materials
To make the bunny on the moon you will need:
– A 2.5mm crochet hook
– Yellow yarn for the moon and yarn in a color of your choice for the bunny
– A tapestry needle and scissors
– Stuffing
– Black thread for the eyes and mouth
– A stitch marker to help you keep track of the start of the round
Please note that you can make the bunny on the moon using any size crochet hook and yarn weight for a smaller or bigger result. I like using DK as it’s most commonly available. If you make amigurumi, it is usually recommended to go down a bit from the recommended hook size for the yarn to allow for a no-hole look (we don’t want to see the stuffing show through in between stitches)! Using DK yarn and a 2.5mm crochet hook, the bunny on the moon should be about 15cm tall.
Stitches & Abbreviations
The pattern is written using US crochet terms in continuous spirals. You will need to know the following kinds of stitches to make him:
– Magic Ring (MR)
– Chaining
– Single crochet (sc)
– Decrease (dec); preferably using the invisible decrease method
– Increase (inc)
And now, let’s get started!
Moon (in yellow)
Round 1: In a MR, sc 6
Round 2: Inc around (12)
Round 3: (Sc, inc) around (18)
Round 4: (Sc 2, inc) around (24)
Round 5: (Sc 3, inc) around (30)
Round 6: (Sc 2, inc) around (40)
Round 7: (Sc 3, inc) around (50)
Round 8: (Sc 4, inc) around (60)
Round 9: (Sc 4, inc) around (72)
Round 10: (Sc 5, inc) around (84)
Round 11: (Sc 6, inc) around (96)
Round 12: (Sc 7, inc) around (108)
Round 14: (Sc 8, inc) around (120)
Round 15: (Sc 7, inc) around (135)
Round 16: (Sc 8, inc) around (150)
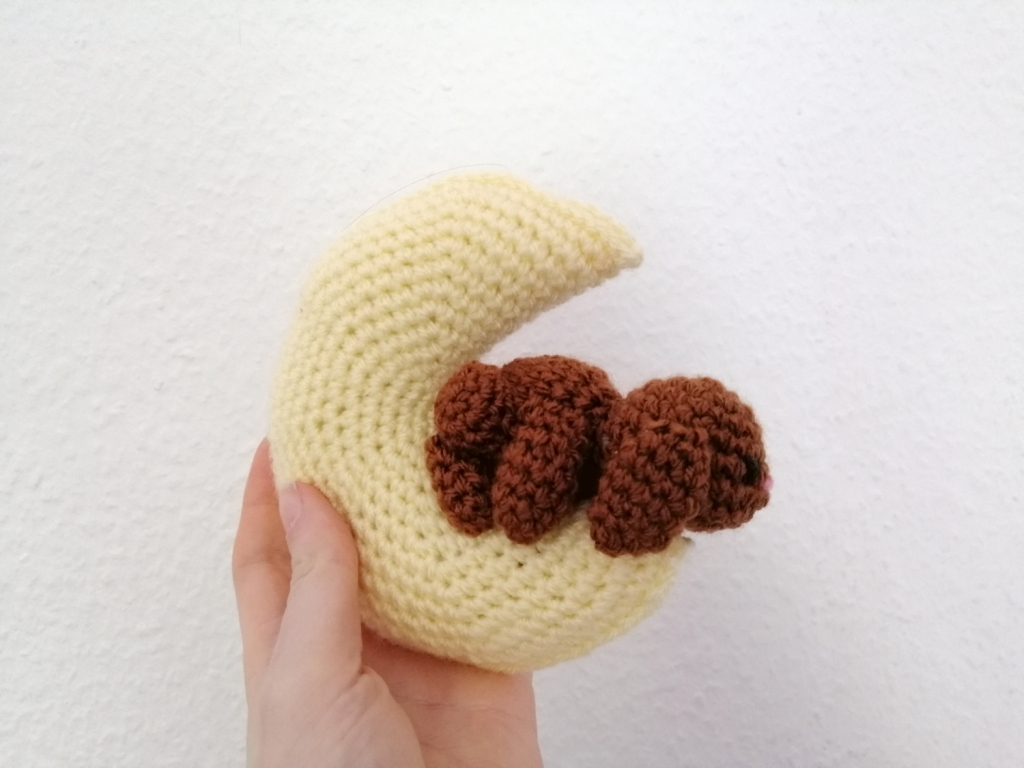
To finish the moon, press it flat; this should form a crescent shape. Stuff it, and then either fasten off and sew it closed, or crochet it closed by crocheting through 2 opposing stitches at once. Time to move on to the bunny!
Head
Round 1: In a MR, sc 6
Round 2: Inc around (12)
Round 3: (Sc, inc) around (18)
Round 4-5: Sc around (18)
Roudn 6: Sc 3, inc, sc 2, inc 2, sc 2, inc, sc 7 (22)
Round 7: Sc around (22)
Round 8: Sc 4, dec, sc 2, dec 2, sc 2, dec, sc 6 (18), stuff
Round 9: (Sc, dec) around (12)
Round 10: Dec around (6), fasten off and sew closed
Ears (make 2)
Round 1: In a MR, sc 4
Round 2: Inc around (8)
Round 3-6 (4 rounds): Sc around (8)
Round 7: (Sc 2, dec) around (6), fasten off
Body
Round 1: In a MR, sc 6
Round 2: Inc around (12)
Round 3: Sc 3, (inc 2, sc) x3 (18)
Round 4-8 (5 rounds): Sc around (18)
Round 9: (Sc, dec) around (12), stuff
Round 10: (Sc, dec) around (9), fasten off and sew closed
Tail
Round 1: In a MR, sc 6
Round 2: Sc around (6), fasten off and sew closed
Arms (make 2)
Round 1: In a MR, sc 6
Round 2: (Sc 2, inc) around (8)
Round 3-5 (3 rounds): Sc around (8)
Round 6: (Sc 2, dec) around (6)
Round 7: Sc around (6), fasten off, stuff lightly and sew closed
Feet (make 2)
Round 1: In a MR, sc 6
Round 2-5 (4 rounds): Sc around (6), fasten off and sew closed
Legs (make 2)
Round 1: In a MR, sc 6
Round 2: Inc around (12)
Round 3: (Sc 2, dec) around (9), fasten off
Assembly
Assembly is relatively simple. First, sew the body to the head (the part where we increased twice on the head is the nose, and the part where on round 3 of the body we sc’ed 3 should be the stomach, so sew the body on accordingly). Then sew the ears to the head and the tail to the butt. Sew the arms onto the sides of the body. For the legs, begin by sewing the legs to the sides of the body (stuffing slightly), then sewing the feet to the legs. Make sure to sew them on at an angle so that it looks like the feet are hanging down. Embroider a cute little face and then all you need to do is sew the bunny to the moon. Done!
And that’s it! Enjoy your new little friend! You may post pictures of your bunny on the moon online as well as sell amigurumi made from this pattern, but I ask that you credit me as the creator of this pattern. Please do not redistribute the pattern.
If you like what I’m doing, consider following me over on Twitter and/or supporting me on Ko-Fi ❤